
Creating a Christmas drawing can be a wonderful way to capture the holiday spirit. Christmas is a long-remembered celebration by millions of people around the world. It is rooted in religious and cultural traditions that are important to many people, including the guidance and shared ideology of the birth of Jesus. During this festival people visit their families, friends, or just enjoy entertainment and happiness. Peoples decorate their houses with green branches, decorate them with bright lights and distribute gifts and sweets. Here’s a simple step-by-step guide to drawing a classic Christmas scene.
Table of Contents
Christmas Drawing Guide Step By Step
- Sketch the Background: Begin by drawing a horizontal line across your paper to represent the ground. Then, sketch in some basic shapes to outline a snowy landscape. Add a few distant trees or buildings to create depth.
- Draw the Christmas Tree: In the center of your scene, draw a triangular shape to represent the Christmas tree. Add some curved lines to create branches and texture. Then, draw small circles or ovals for ornaments and a star or angel on top.
- Add Decorations: Use colored pencils or markers to add vibrant colors to your ornaments and tree decorations. You can also add tinsel, garlands, and strings of lights to make your tree sparkle.
- Include a Festive Character: Draw Santa Claus, a snowman, or a group of carolers near the Christmas tree. Add details like Santa’s red suit and hat, the snowman’s carrot nose and coal eyes, or the carolers’ scarves and songbooks.
- Fill in the Details: Add snowflakes falling from the sky, presents under the tree, and any other festive details you’d like to include. Don’t forget to add shadows and highlights to give your drawing depth and dimension.
- Final Touches: Once you’re happy with your drawing, go over any lines you want to emphasize with a darker pencil or pen. You can also add shading and blending to make your drawing look more polished.
Create Christmas Drawing
1. Christmas Tree
- Step 1: Draw the outline of the tree trunk: Start by drawing a vertical line for the trunk of the tree. You can make it straight or slightly curved, depending on your preference.
- Step 2: Sketch the branches: From the top of the trunk, draw several horizontal lines branching out to form the layers of the tree. These lines should gradually decrease in length as you move down the trunk to create a triangular shape.
- Step 3: Add details to the branches: Draw small V-shapes along the branches to represent individual pine needles. Vary the size and direction of the V-shapes to give the tree a natural look.
- Step 4: Draw decorations: Add decorations such as balls, stars, ribbons, or lights to the branches. You can draw them as simple shapes or add more detail depending on your preference.
- Step 5: Draw a star or an angel at the top: At the top of the tree, draw a star or an angel to symbolize the tree topper. You can also add a small circle or oval around the star to represent a halo if you’re drawing an angel.
- Step 6: Add a tree skirt or base: Draw a curved line around the bottom of the trunk to represent the tree skirt or base. You can add patterns or designs to make it more festive.
- Step 7: Add final touches: Go over your drawing and add any final details or decorations you’d like. You can also add shading or color to bring your Christmas tree to life.
2. Santa Claus

- Step 1: Sketch the head and body: Start by drawing a circle for Santa’s head and a larger oval beneath it for his body.
- Step 2: Draw the facial features: Inside the circle, draw two small circles for eyes and a curved line for the nose. Add a big smile by drawing a curved line below the nose. You can also add a fluffy beard and mustache by drawing a series of curved lines around the mouth area.
- Step 3: Add Santa’s hat: Draw a triangle shape on top of Santa’s head for his hat. Extend two lines downwards from the base of the triangle to create the sides of the hat. Add a fluffy ball at the tip of the hat.
- Step 4: Sketch Santa’s arms and hands: Draw two curved lines extending from the sides of Santa’s body to represent his arms. Add circles or ovals at the ends of the lines for his hands.
- Step 5: Draw Santa’s clothing: Add details to Santa’s suit by drawing a wide belt around his waist and adding a buckle in the center. Draw a curved line across the bottom of his body to represent the edge of his coat. You can also add some folds and wrinkles to make the clothing look more realistic.
- Step 6: Add Santa’s boots: Draw two rectangles at the bottom of Santa’s body for his boots. Add curved lines at the top of each rectangle to represent the cuffs of his boots.
- Step 7: Add final details: Go over your drawing and add any final details, such as eyebrows, wrinkles on the suit, or shading to give the drawing more depth.
3. Snowman
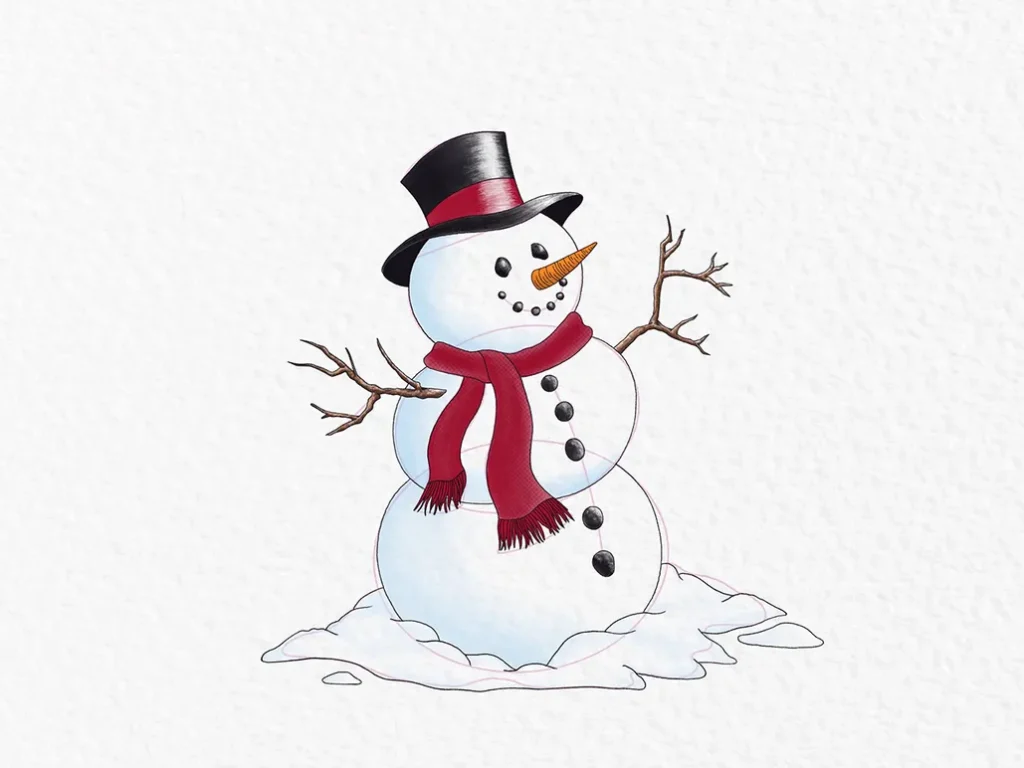
- Step 1: Draw the snowman’s body: Start by drawing three circles stacked on top of each other. The bottom circle should be the largest, the middle circle slightly smaller, and the top circle the smallest. These circles will represent the snowman’s body, with the largest circle at the bottom being the base.
- Step 2: Add details to the snowman’s face: On the top circle (the snowman’s head), draw two small circles for the eyes and a larger circle or oval for the mouth. You can add coal or small stones for the eyes and mouth, and draw a carrot or small triangle for the nose.
- Step 3: Draw the snowman’s arms: Extend two curved lines outward from the middle circle (the snowman’s torso) to represent its arms. You can give the snowman stick arms or add mittens or gloves to the ends of the arms for a more festive look.
- Step 4: Add accessories: Draw a scarf around the snowman’s neck by sketching two parallel lines across the bottom of the snowman’s head and torso. You can also add buttons or a broomstick next to the snowman for extra detail.
- Step 5: Decorate the snowman: Add any additional decorations or accessories you like, such as a top hat, earmuffs, or a pipe. Be creative and personalize your snowman to make it unique!
- Step 6: Add snow and background: Draw curved lines or squiggles around the snowman to represent snow on the ground. You can also add a background, such as trees, houses, or a snowy landscape, to complete the scene.
- Step 7: Add final touches: Go over your drawing and add any final details or shading to make it pop. You can also use colored pencils or markers to add color to your snowman and background if you prefer.
4. Reindeer

- Step 1: Sketch the body and head: Start by drawing a large oval for the reindeer’s body. Then, draw a smaller oval above and slightly overlapping the larger one for the reindeer’s head.
- Step 2: Add the neck and legs: Draw a curved line connecting the head to the body to create the neck. Then, draw four lines extending downward from the body for the legs. Make the front legs shorter and thicker than the hind legs.
- Step 3: Draw the antlers: On top of the reindeer’s head, draw two curved lines branching outwards to represent the antlers. Add smaller branches or points along the antlers to give them texture and detail.
- Step 4: Add the facial features: Draw two small circles for the eyes and a small oval or circle for the nose. Add two curved lines above the eyes for the eyebrows and a small mouth below the nose.
- Step 5: Sketch the ears and tail: Draw two small triangles on either side of the reindeer’s head for the ears. Then, add a small triangle or oval at the back of the body for the tail.
- Step 6: Add details and shading: Go over your drawing and add any additional details, such as fur texture on the body, hooves on the legs, and shading to give the reindeer dimension and depth.
- Step 7: Add a background: Draw a simple background, such as snow-covered trees or a winter landscape, to complete the scene and give your reindeer a festive setting.
- Step 8: Final touches: Review your drawing and make any final adjustments or additions as needed. Add any finishing touches, such as snowflakes or holiday decorations, to enhance the Christmas theme.
Once you’re satisfied with your drawing, you’ll have a charming reindeer ready to join Santa on his magical journey!
Read More: Uttarkashi Tunnel मे आख़िर कैसे फ़से मजदुर